15 FPL Team Tips for Transfers, Captaincy and Planning
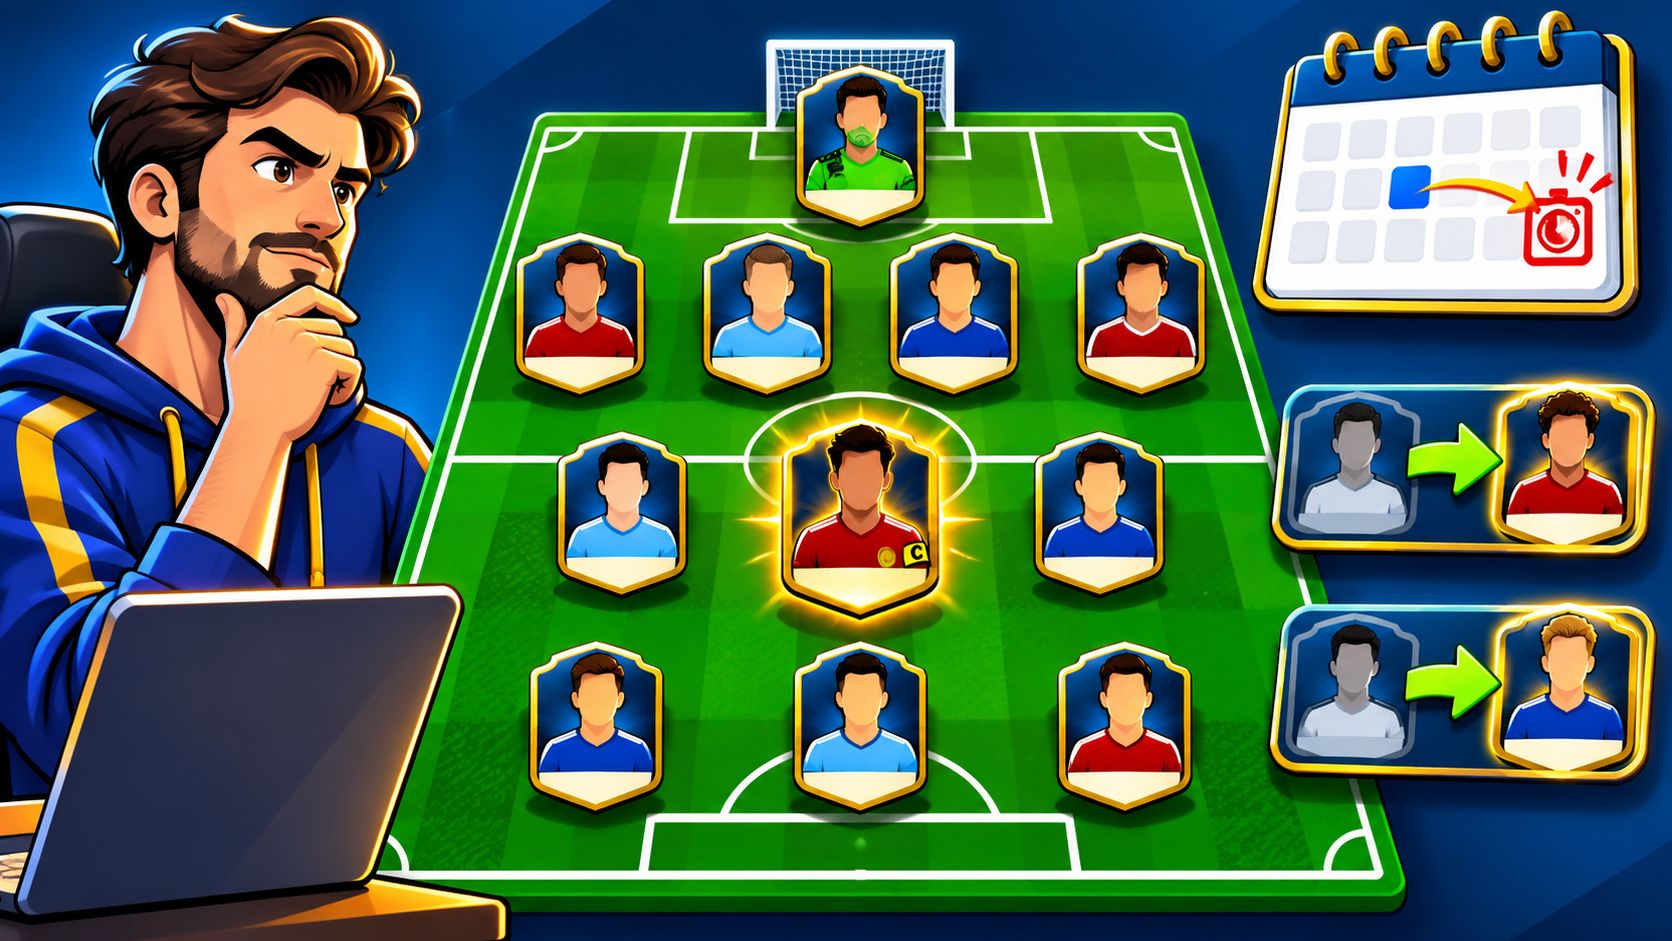
You've got an injured defender, banked transfers and a captaincy decision to settle before the deadline, but replacing the injured player immediately is only sensible if the likely absence outweighs the value of waiting for clearer team news.
The same squad can justify buying, holding or selling depending on the bench, available budget and length of time you intend to own the replacement.
The decision comes before the shortlist.
Useful FPL team tips should help you identify the problem, compare affordable alternatives and explain what would change your judgement.
Buy when the incoming player improves a defined weakness through credible minutes, role and fixtures.
Hold when the owned player remains suitable and the replacement offers too little improvement.
Wait when unresolved availability or selection news could materially change the decision.
These are evergreen judgements, not a live gameweek shortlist, and no current player prices, injuries, fixtures or deadlines are asserted below.
Season-specific scoring examples are labelled rather than presented as permanent rules.
Before acting, check the current official game and relevant club reporting, particularly where a transfer depends on a player returning, retaining a starting place or benefiting from a tactical change.
1. Decide Transfers Against the Next Deadline, Not the Last Result
Transfer out a weakening role, not a disappointing score, unless the latest performance reveals something likely to persist.
A defender who blanked while retaining his starting place presents a different problem from a defender who lost his place.
Name the problem. Write down whether you're addressing absence, rotation, poor fixtures or limited attacking involvement.
Compare affordable alternatives. Include another player in the same position and the option of making no transfer.
Set the ownership horizon. Judge the replacement across the fixtures you intend to keep him for.
Say your defender's starting role is under threat.
A replacement with dependable minutes may be preferable to last weekend's highest scorer if that scorer shares his position with another player.
Conversely, holding a secure midfielder through a difficult fixture can be reasonable when buying the alternative would create another transfer problem afterwards.

2. Use Free Transfers Deliberately and Protect Your Banked Moves
Bank a transfer when your squad has no material weakness and the available moves are marginal.
That isn't inactivity for its own sake, because retaining flexibility lets you respond when selection or availability becomes clearer.
Practical rule: Don't spend a free transfer merely because you can identify a different player you like.
Suppose official club reporting rules out a starter while another owned player remains doubtful.
Replacing the confirmed absentee while retaining flexibility for the doubtful player can be more useful than spending every available move immediately.
Check the live allowance. Confirm your banked transfers and the current season's rollover rules inside the game.
Separate urgent from optional. An unavailable starter needs a different response from an upgrade to a functioning bench.
Consider the next problem. A cheap replacement is less attractive if you already expect to sell him shortly afterwards.
Use the transfer when it solves something substantial, rather than treating a banked move as wasted value.
3. Calculate Whether a Points Hit Is Worth Taking
A hit is easier to justify when it replaces a genuine gap than when it exchanges similar available players.
Under the official FPL transfer rules, each transfer beyond your free allowance costs four points, which the replacement must overcome through an improvement over the alternative.
Compare complete outcomes. Include the incoming player, the outgoing player's likely contribution and any bench cover.
Use a consistent horizon. Don't compare the replacement's longer fixture run with only the outgoing player's next match.
Allow for uncertainty. A small projected advantage isn't reliable if the new signing's minutes remain unclear.
Say an injured midfielder cannot play but your substitute has a credible starting role.
The relevant comparison is buying the replacement against using that substitute, not buying against an empty position.
A sideways move between available midfielders needs a stronger case because you're paying for an improvement rather than restoring coverage.

4. Assess Price Movement Without Chasing Rises
Move early for affordability only when the football case already works.
An anticipated price change doesn't make an uncertain starter a good purchase, and transfer activity shouldn't substitute for checking his role.
Check the actual transaction. Use the current purchase price, your available bank and the owned player's displayed selling value.
Identify the consequence. Establish whether a price change would block the intended move or merely reduce spare budget.
Price the information risk. Buying before team news means accepting that later information could weaken the choice.
Suppose your preferred replacement is affordable now but might become inaccessible before the deadline.
Buying early can be defensible if his role is secure and you're comfortable carrying the remaining uncertainty.
If a similarly suitable alternative remains affordable, waiting may preserve useful information without materially weakening the squad.
Don't sell an otherwise suitable player because his displayed value has fallen.
5. Choose Your Captain by Expected Minutes and Fixture Quality
Choose the captain with the strongest combination of credible playing time and attacking opportunity, rather than automatically selecting the most expensive player.
The Premier League's FPL guide confirms that the captain scores double points, so uncertainty about his involvement deserves particular attention.
Minutes first. Establish whether the player is likely to start and retain a substantial role.
Attacking role next. Examine penalty involvement, central shooting positions and chance creation.
Fixture context alongside both. Judge the opponent without assuming an attractive match guarantees returns.
Say a popular captain has unresolved fitness concerns while another premium attacker has a secure role.
The alternative can be preferable even if his maximum upside appears lower.
Equally, dependable minutes alone don't make a limited attacking player the best captain, because reliability still needs meaningful scoring opportunities.

6. Set a Vice-Captain as Insurance Against Late Changes
Judge the captain first; the vice-captain only covers a late loss of minutes.
Choose a vice-captain you would still accept as captain if team news moved against your preferred option close to the deadline. A reliable starter with a clear route to points is better cover than a streaky substitute, because the insurance only matters if the replacement plays.
The vice-captain should absorb the captain's absence while adding a different, credible route to points.
For example, pairing captain and vice-captain in the same match concentrates the risk of rotation, a postponement or a shared blank fixture. A strong option in another fixture can loosen that dependency, though a wider gap in expected involvement still outweighs diversification for its own sake.
Define the trigger. Check the current captaincy rules before assuming the vice-captain repairs every poor outcome.
Read availability carefully. A chance-of-playing flag describes doubt; it does not confirm a start.
Avoid cosmetic insurance. A dependable deputy does not make an uncertain captain acceptable.
The decision to settle is whether the first-choice captain remains worth the risk before the deadline. If he is, set cover and move on. If he is not, change the captain rather than asking the vice-captain to correct the choice later.
7. Build the Starting XI Around Minutes Security
Prefer secure minutes when the competing players offer similar opportunities, but investigate what those minutes contain.
Starting regularly supports selection, while defensive workload, advanced positioning and set pieces explain the routes to points.
For 2025/26, the official scoring rules award defenders two defensive-contribution points for reaching 10 combined clearances, blocks, interceptions and tackles in a completed match.
Track starts separately. Substitute appearances don't demonstrate the same role as regular starts.
Inspect recent changes. A new manager or returning team-mate can make the season record less representative.
Assess repeatable involvement. Defensive contributions need match-specific workload, not just a favourable reputation.
Suppose an affordable defender starts reliably and repeatedly records substantial defensive involvement.
He may deserve selection over a more attacking-looking alternative whose position is shared.
That doesn't make the contribution threshold guaranteed, and a difficult opponent can increase defensive workload while weakening clean-sheet prospects.
8. Plan Around Injury Flags and Team News Without Overreacting
Your midfielder returns to training on the Friday before a deadline, and the club has not said whether he is ready to start or merely available. The decision is narrower than the uncertainty suggests: hold a doubtful starter when bench cover is credible, and sell only when an absence is confirmed to be extended.
Waiting is worthwhile while the uncertainty stays material and the intended transfer remains affordable. Selling an owned player on an unconfirmed flag can remove someone you wanted beyond the immediate fixture, and buying a target on an optimistic update can pay starter prices for substitute minutes.
Read the wording. Returning to training, being available and being ready to start describe different situations.
Check the source. Weigh official club reporting against the player's status in the game.
Inspect your cover. A playable substitute lowers the cost of holding through a doubtful week.
A confirmed extended absence settles the question differently, particularly when the injured player occupies substantial budget. At that point the transfer prices a known absence rather than an unresolved one.
9. Use Bench Order to Protect Points When Starters Do Not Play
Order your bench by useful expected contribution, subject to the game's substitution and formation requirements.
The most expensive substitute isn't automatically the best cover, and positional eligibility matters when replacing a non-playing starter.
Our bench-or-start decision guide provides a relevant framework for weighing the starting choice against the cover behind it.
Check eligibility. Make sure your preferred substitute can enter without breaking the permitted formation.
Compare realistic minutes. A likely starter can offer better cover than a substitute with an attractive fixture.
Revisit after news. Updating the starting side without updating the bench leaves the selection incomplete.
Suppose a doubtful defender starts in your chosen line-up.
Your preferred attacking substitute may not provide the required positional cover, so check how an eligible defender would enter.
Bench strength also affects transfer urgency, because a credible replacement can make holding a doubtful owned player more defensible.
10. Read Fixture Runs Across Several Gameweeks
Buy for the fixture period you intend to own the player, not the most appealing match on the calendar.
The Premier League's fixture analysis explains the official Fixture Difficulty Rating scale from one to five, but those ratings describe opponent difficulty rather than guaranteed player returns.
Define the window. Assess the same upcoming fixtures for every candidate.
Inspect the sequence. An attractive average can conceal a difficult immediate match.
Override with a reason. Uncertain minutes or a weak role can outweigh favourable opposition.
Say an affordable attacker has an appealing fixture run but remains a rotation option.
Buying a slightly less attractive fixture sequence with a dependable starter may better suit a squad lacking bench cover.
An owned player can also remain worth holding through difficult opposition if his role is intact and selling would require a reversal soon afterwards.
11. Plan Ahead for Double and Blank Gameweeks
Act on confirmed scheduling rather than treating a possible rearrangement as a settled transfer case.
A double creates additional playing opportunities, while a blank removes the immediate fixture opportunity, but neither settles the player decision alone.
Use our double gameweek planning guide to structure the squad implications rather than collecting players with extra fixtures.
Check confirmation. Distinguish an announced schedule from a potential rearrangement.
Assess participation. Additional team fixtures don't guarantee additional starts for an individual.
Plan the exit. Include the fixtures and squad structure that remain afterwards.
For example, buying a rotation-prone attacker for a double may disappoint if he shares minutes across the schedule.
A secure starter can offer a more credible route to benefiting from the extra opportunity.
Ahead of a blank, gradual transfers can preserve flexibility, provided the incoming players remain useful rather than becoming immediate sell candidates.
12. Time Chips Such as Wildcard and Free Hit to Maximum Effect
Use a chip when it addresses a broader structural problem or a clearly valuable fixture opportunity.
A disappointing score alone doesn't establish that your squad needs rebuilding.
For the 2026/27 season, the Premier League's published chip structure specifies a Wildcard, Free Hit, Triple Captain and Bench Boost in each half, with unused opening-half chips expiring before the Gameweek 19 deadline.
Define the purpose. Separate temporary fixture disruption from a squad that needs lasting changes.
Check availability. Verify the rules and chips shown in your account for the relevant season.
Prepare the surrounding squad. Consider what you'll own after the target deadline.
Suppose your established squad remains suitable beyond an awkward fixture week.
Our Free Hit planning guide is relevant to that temporary problem, whereas sustained injuries and lost starting roles may justify a more permanent rebuild.
13. Balance Template Picks With Calculated Differentials
A lower-owned pick earns its place only when the football case already stands. TSB% measures the percentage of all FPL managers who own a player, and your own mini-league can look quite different from that global figure.
Establish the football case. Look for credible minutes and a role capable of producing returns.
Apply your squad filters. Position, price, minutes and availability checks can rule players out before ownership enters the decision.
Match the risk to your objective. Weigh the gap you're trying to close against the expected contribution you would give up.
A mini-league leader owns the popular midfielder you favour, and you trail. A lower-owned alternative of comparable quality separates you from him only on the weeks he outscores the template pick, while a plainly weaker selection concedes expected points whatever his ownership. The calculated move is a differential whose minutes, role and fixtures already justify the transfer, taken with the acceptance that a miss widens the gap it was meant to close.
14. Hold or Sell an Owned Player Using Clear Triggers
Hold while the player remains suitable and the replacement advantage is insufficient to justify the transaction.
Buying demands a positive case for allocating budget now, whereas holding asks whether changing the existing allocation improves the squad enough.
The Premier League's 2025/26 scoring update establishes defensive contributions as an additional scoring route, which supports assessing an owned defender beyond clean sheets alone.
Minutes trigger. Sell consideration strengthens when a player persistently loses his starting role.
Role trigger. Reassess when attacking positioning or set-piece involvement changes.
Availability trigger. Compare the expected absence with bench quality and replacement options.
Say your defender concedes but retains secure minutes and useful defensive involvement.
Holding may be preferable to buying a fashionable alternative with uncertain starts.
A midfielder displaced by a new team-mate presents a stronger sale case because the concern affects future involvement, not merely the last score.
15. Separate Season Totals From Recent-Form Samples and Chance Metrics
A substitute forward can top a per-90 table after a handful of cameo appearances. Judging him against a regular starter requires knowing which sample produced each number.
The official FPL statistics framework treats expected goals and expected assists as chance-involvement measures; expected goal involvement combines them as xG plus xA rather than promising returns.
Season totals. Assess the completed-match record alongside total playing time.
Recent samples. Ask whether the current role differs from the longer record.
Rate statistics. Check the minutes denominator before trusting xGI per 90.
Expected points. Keep official xP confined to the next gameweek.
An impressive chance-involvement rate built mostly on substitute appearances supports investigating his attacking contribution. Whether it survives a larger sample depends on minutes and role.
Prices, ownership and live points keep moving between deadlines, so season figures quoted alongside them belong to a completed window. For a purchase, the recent sample tests whether the role has changed; for holding, the longer record shows whether the baseline still stands.
Treat a strong rate in limited minutes as a prompt to investigate the role.
What each FPL team tip settles and what to verify before acting
A useful FPL tip should settle one decision: buy, hold, sell, start, bench, captain or wait. The table below keeps that purpose explicit. It also names the specific risk that can invalidate the choice and a reader-facing check to make before acting.
Decision settled | Specific drawback | What to verify before acting |
|---|---|---|
Which transfer solves the next gameweek problem | A transfer based on the last result can miss the next fixture context. | Confirm the deadline, transfer rules and next-gameweek fixture before locking the move. |
Whether to spend or retain a free transfer | Banking too long can leave a clear weakness unaddressed. | Check the current free-transfer count and the official rules for the season. |
Whether a points hit has a realistic payback | Future gains are uncertain, and the hit applies immediately. | Check the points deduction, official next-gameweek xP and the player's minutes and role. |
Whether a price rise justifies action now | Waiting for firmer news can cost access if a player rises. | Check the current price and ownership figure in the official game before deciding. |
Who offers the best captain case | Good fixtures and strong xP do not remove role or availability risk. | Check fixtures, team news and official next-gameweek xP for the narrow shortlist. |
Who provides sensible vice-captain cover | A similarly exposed vice-captain gives little protection against late news. | Check the vice-captain rule and the scoring conditions that apply if the captain does not play. |
Which starters have the strongest minutes case | Low attacking upside can weaken a safe minutes pick. | Check minutes, starting records, role and availability from official FPL data and club reporting. |
Whether an injury flag changes your plan | Reacting early can waste a transfer; waiting can remove alternatives. | Check the flag, club team news and FPL availability information close to the deadline. |
Which substitute order protects the bench | Formation limits can stop a substitute entering the match. | Check the substitution rules and your bench order before kickoff. |
Whether a fixture run supports holding or planning a move | Fixture difficulty becomes less reliable further ahead. | Check dates and rescheduling against official Premier League information. |
Whether double or blank planning helps or weakens the squad | A move for one gameweek can damage another. | Check confirmed double and blank gameweeks against official league and game data. |
Whether a chip matches the problem | Early chip use can remove the best response to later fixtures. | Check chip names, availability and rules on the official FPL site for the season. |
Whether a low-owned player adds value | Low ownership can produce weak ranks as well as gains. | Check current ownership, official next-gameweek xP and the reason for the role change. |
Whether an owned player has earned a place | Holding too long and selling too early both create opportunity cost. | Check selling price, minutes, role and availability against official game data and club reporting. |
Whether a metric supports a decision or only describes the past | Chance metrics show involvement, not guaranteed future returns. | Record the season, completed-gameweek window and refresh time before comparing players. |
The useful distinction is between checks that settle the decision and checks that only add confidence. Deadline, rules, price, ownership, minutes, role and availability can change the action. Historical rates and chance metrics should shape the shortlist, then give way to next-gameweek xP, fixtures and team news when the choice becomes final.
For a points hit, the order matters. Establish the deduction first, then compare official next-gameweek xP with the player's minutes and role. If the projected gain depends on a substitute role becoming a starting role, the hit is carrying a team-news bet as well as a points bet.
The same logic applies to captain and vice-captain choices. Official next-gameweek xP is the expected-points value supplied by FPL and used unchanged by FPL Player Stats. It is for the next gameweek only. TFA projections are labelled estimates, and their method is explained beside the relevant map. Use them to frame uncertainty, not to convert a close call into certainty.
Bench order, chips and fixture planning are smaller decisions, but they still need a trigger. A bench order without a clear substitution route is weak insurance. A chip without a defined gameweek problem is hard to evaluate after the fact. A double-gameweek plan that leaves the following week short has only moved the problem.
Low ownership is only useful when it changes the decision. Official ownership is the percentage of all FPL managers who own the player. A differential pick becomes relevant when its official next-gameweek xP is strong relative to that ownership and its role is secure enough to survive team news. Otherwise it is just a different way to take the same risk.
The final check is whether the tip addresses the decision you face. Buying, holding and selling are separate cases, even when they involve the same player. A buy needs an affordable route and a next-gameweek role. A hold needs a continuing reason. A sell needs a trigger, such as lost minutes, a changed role or a better use of the transfer.
Turn Each Tip Into a Reviewed Decision
A transfer should begin with a narrow question: what decision is this move meant to settle? Write that down before checking candidates. Separate buying a new player from holding an owned one, because the evidence differs. A buy needs a role, minutes path and fixture case. A hold needs a reason to keep the place and a clear trigger for changing course.
Record the problem you're solving, the affordable alternatives, the reason for your choice and the development that would make you reconsider.
Record the judgement before the outcome
A useful entry might explain that you held a doubtful defender because his underlying role remained secure, bench cover was available and the replacement offered little lasting improvement.
That record is more informative than remembering only whether the defender eventually scored. It shows whether the decision used the right inputs at the time. It also makes later corrections easier, because you can see which assumption failed.
Problem. Identify the actual weakness rather than describing general dissatisfaction.
Alternatives. Include holding, using the bench and waiting where those remain possible.
Trigger. State what news or role change would justify a different action.
Review point. Specify when the judgement should be revisited.
After the deadline, assess the reasoning separately from the result.
A well-supported captain can blank, while an uncertain substitute can score, and neither outcome alone tells you whether the original choice was sound. The stronger test is whether minutes, role, fixtures, price and availability were weighed consistently. A result can be lucky and still leave a weak process intact. A poor score can follow a sound decision that was overtaken by team news.
Review the process without inventing certainty
Check whether the information you relied on was accurate and whether you gave appropriate weight to minutes, role and availability. Keep completed-match evidence separate from market data and live gameweek points, since those refresh on different cycles.
If you repeatedly buy before material team news, or compare replacement candidates across different statistical windows, change that part of the process. Use workflow optimization for small teams as a narrow administrative idea here: keep the record short, repeatable and tied to the same pre-deadline questions.
Keep the football judgement central and the administration brief.
Your final review should cover the whole squad, not just the incoming transfer.
A purchase can improve an individual position while weakening bench cover, restricting the next captaincy move or leaving too little flexibility for an unresolved injury. Note those knock-on effects at the point of decision. A player who improves your starting XI may still be a poor transfer if he removes cover for a doubtful starter or leaves you without a viable captain option.
Before your next deadline, write down your main squad problem and compare buying with holding before opening a wider shortlist.
FPL Player Stats can support that comparison through individual player profiles and public shortlist maps. Confirm the current price, selling value, availability, fixtures and deadline in the official game before confirming the move.